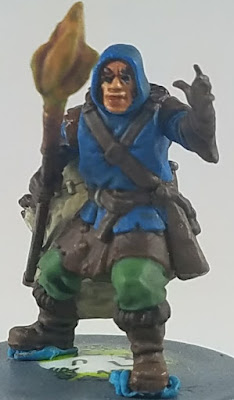
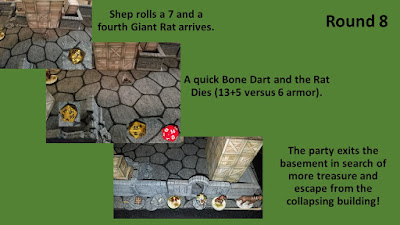
Presenting the ongoing adventures of my son Sheppard's Chronomancer in the Frozen City of Felstad!
Thursday, September 28, 2017
Wednesday, September 20, 2017
Painting Guide: Radagast
As a bonus figure in the pack, Radagast the
Brown was included in the starter set, and while he does not have a part to
play in the escape from Goblin Town, he is an excellent sculpt and comes with a
sculpted base as well. The base has a
lot of hidden details I did not catch until I started painting/highlighting the
base coat.
0. Radagast started with a Matt
Black under coat.
1. Paint the flesh using Tanned Flesh.
1. Paint the flesh using Tanned Flesh.
1a. Wash the skin with Soft Tone.
1b. Highlight using Barbarian Flesh.
2. Base
coat the hair and beard in Monster Brown.
2a. Highlight the hair in Ash Grey.
2b. Add a second highlight Matt White.
2c. Wash with Strong Tone.
3. Paint Radagast’s trousers in
Oak Brown.
3a. Highlight the trousers with Leather Brown.
4. Paint Radagast’s shirt in
Desert Yellow.
4a. Wash the shirt in Strong Tone.
5. Paint Radagast’s shoes with
Oak Brown.
5a. Highlight the shoes with Monster Brown.
5b. Wash the shoes with Dark Tone.
5c. Add a second highlight of Monster Brown.
6. Paint the log and staff in
Oak Brown.
6a. Highlight with Leather Brown.
7. The two spiders are painted
Matt Black.
7a. Highlight with Uniform Grey.
8. Paint the staff top in
Crystal Blue.
8a. Wash with Blue Tone.
8b. Highlight with Hydra Turquoise.
9. Paint Radagast’s coat in
Leather Brown.
9a. Wash the top of the coat in Strong Tone.
9b. Wash the bottom of the coat in Dark Tone.
9c. Highlight the details with Fur Brown.
10. Paint the satchel in Leather
Brown.
10a. Wash the satchel in Strong Tone.
10b. Highlight the details with Monster Brown.
11. Paint the leaves with Goblin
Green.
11a. Wash the leaves in the satchel with Strong Tone.
12. Paint Sebastian in Oak Brown.
12a. Paint Sebastian’s face with Skeleton Bone.
12b. Highlight Sebastian’s spikes with Skeleton Bone.
12c. Add dots of Matt Black for Sebastian’s eyes and nose.
Some last notes:
A. The eyes were painted between the Flesh Tone
Wash and the Barbarian Flesh Highlight.
The eyes are done with a 5/0 brush.
First paint a horizontal white line and then place a black dot in the
center.
B. AP Soft Tone is a good wash for flesh and
other light colored items.
C. AP Strong Tone is a good general brown wash
similar to Citadel's Agrax Earth Shade.
D. AP Dark Tone is a good black wash similar to
Citadel's Nuln Oil.
I added some Army Painter Summer Grass to the base
and then painted the edge of the base in Leather Brown.
Before we have the painting guide for the
goblins we have the terrain tutorial I have been talking about. In addition, beginning next week, I am going
to be alternating between the painting guides and battle reports. Shep played his first game of Frostgrave
tonight and I will be putting together the 72 picture battle report this week.
Monday, September 18, 2017
Weekly Workbench 17 September 2017
A little late this week, between Cub Scouts starting up, PME starting back up, and my mother arriving a day early for her visit it really threw my week out of wack for getting things done. This includes the Painting Guide post which will be out on this Wednesday. I did get in a game of Warlord Games' Test of Honor on TableTop Commander's After Hours Paint and Chat Ep.99 hosted by Rocky's War Room. The game was surprisingly easy to learn, especially online with no rule book to refer to. I had a lot of fun and won the first scenario. Thanks to Matt for hosting and to Bob for being a worthy opponent! I will likely look at picking this up once the Frostgrave campaigns are up and running and my SAGA war bands are completed.
Fantasy:
Here is where the majority of my work this week got done. First up is Duncan's Frostgrave Summoner crew. They have been base coated and washed and now just need some minor highlights and then dull coated.
 |
| First up is the Summoner himself. |
 |
| The Apprentice bringing forth some extra-planar entity. |
 |
| The Captain. |
Sheppard's Garr War Dog from Reaper Bones is in the same state.
 |
| War Hound in need of some highlights. |
And I also finished up six large Reaper Bones rats, always useful and playing a role in the first scenario.
Playing the primary antagonist in the first scenario will be the Alchemical Monstrosity, represented by this HD Minis D&D Displacer Beast.
 |
| Need to clean up the lines and add some dull coat. |
Terrain:
Dave Graffam is having a sale on his paper craft sets over on Wargame Vault. Most sets are only $1.00! This is a cheap way to quickly get some terrain on the table and add some variety. He has everything from fantasy buildings, medieval buildings, frontier buildings, ships, walls, bombed buildings, floor tiles, and accessories. The first set I printed out and started putting together are the Wooden Crates, which will add more dimension to the Alchemical Workshop in the first campaign and find uses in other scenarios as well. I am using insulation foam to wrap them around for added stability and durability with the kids. After attempting to cut the foam with a hot wire cutter and an xacto knife I found the band saw works just fine and provides the straightest, cleanest, and quickest lines.
 |
| The start of my crates. |
So far I have completed a 4x4x2, 4x2x2, 3x3x2, 3x3x1, 3x2x2, 3x1x1, (2) 2x2x1, (2) 2x1x1, and (5) 1x1x1s. I still have (2) 4x1x1, (2) 3xx1x1, 2x2x2, (2) 2x1x1, and (4) 1x1x1s left from the first 15 page printing. The kits look really good, though I will need to invest in some other color sharpies to handle edging as the black is really apparent on the crates, and pretty sturdy on their own when printed on 110lb card stock.
That is it for this week, the painting guide will be out this week and next week will have a terrain tutorial as I finished the painting last night.
Sunday, September 10, 2017
Weekly Workbench 10 September 2017
Lots of different things getting done this week with my extra time off. The big one was rearranging the work bench from one side of the room to the other. I no longer feel squished into a corner, the lighting is brighter, and the room is much open!
This was done in part to add an additional space for the new photo station I received. The make shift desk is temporary, once I have the funds for a second desk I will also be adding a spray booth for an airbrush.

 Speaking of air brushes, a good friend gifted me this Paasche Talon from his modeling days. I cannot wait to put it to use!
With the four different tips and three needles I will be able to use it on everything from detail work to large area coating on terrain pieces! This should be a great time saver and money saver when it comes to priming large items.
I will be spending a lot of time with it and reading the handy pamphlet that came with it during the next week.
Historical:
Here is a better look at my Scots Thanes for SAGA with their completed bases and shields. Much better results in the new photo booth!
The warlord should be completed this week as...
...a package arrived from Footsore Miniatures and inside...
...were a large number of reinforcements to include...
...the Picts/Scots Handler and Warhounds! While the SAGA Scots army list does not have a place for the warhounds (Irish Wolfhounds), I am going to place one of them on the base with my warlord. Some of the others will likely make it into some of the Frostgrave warbands for the kids.
Also in the package was a set of Scots Warriors with Hand Weapons...
...and three sets of Scots Warriors with Javelins to use as my levies! All the Javelin throwers were the same four out of the eight possible variants but with Footsore a month behind orders due to their furnace breaking I cannot hold it against them.
Also included was the free Viking hero Torston Oakhammer, which will be available for purchase towards the end of the year.
Fantasy:
Three wizards and their apprentices were finished and are ready to enter the Alchemist Lab in Frostgrave's Felstad city once they hire some helpers.
 First up are Shep's Chronomancers: Bubba Timehopper and Clara!

 Next is Ivy's Elementalists: Rhea and Karana!
And last is Mugzy's Sigilists: Mugzeritte and Meadow!
Duncan's Sumonners and Gideon's Enchanters (that he is having me redo his paint job on new models) should be done this week and then the exploration will begin!
Terrain:
Speaking of exploration, more work got done on my first foam ruined building. I glued it to a plywood base, added rubble to the sides, a broken ladder to reach the platform, and then primed everything black. I have to touch up some of the primer in some tough to reach spaces and then should have it painted sometime this week!
I have another terrain project I working on as well but I am going to save that for the tutorial post the Wednesday after this coming.
That's it for this week but be sure to stop in Wednesday for a Painting Guide on Radagast the Brown! See you next week!
Subscribe to:
Comments (Atom)
Weekly Workbench 18 March 2018
I did not get to finish a war band member this weekend as I finished converting the boys triple bunk beds into a regular bunk and a loft bed...

-
Here we are for another Weekly Workbench update. Lots of time building a terrain piece this week as seen below and knocking out a...
-
The instigator of this little party, Gandalf the Grey, has arrived and is ready to begin! Despite him coming out a little dark, this i...


